Slide 1

Slide notes: When we put a new entry onto the Planned Maintenance Master, we start with the Job Master, because the Job must exist before it can be placed on the Maintenance Register.


Slide 2

Slide notes:


Slide 3

Slide notes:


Slide 4

Slide 
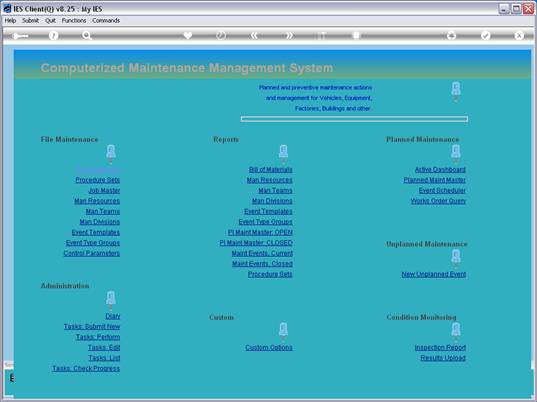
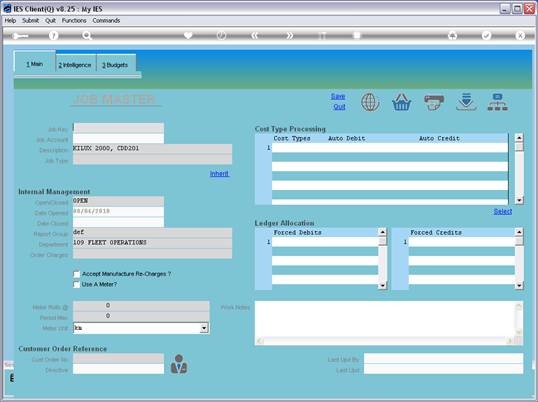
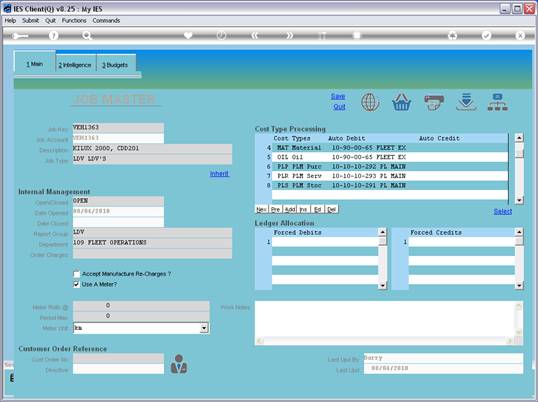
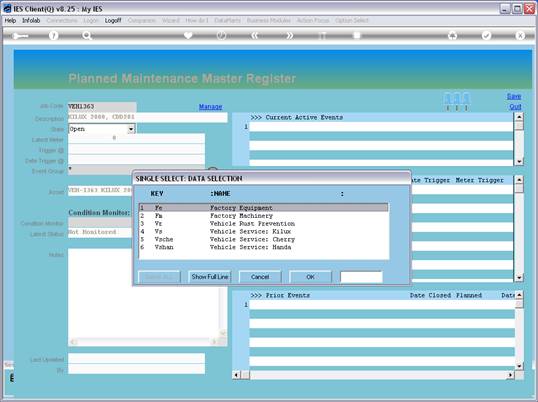
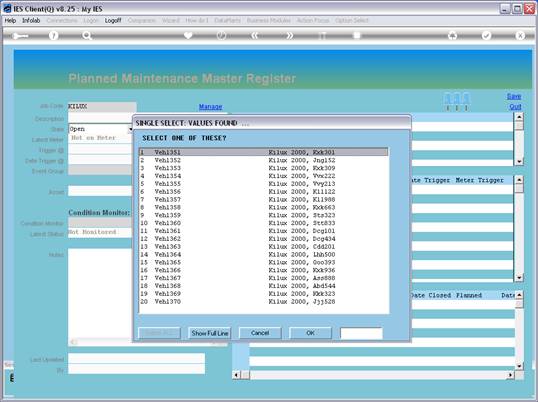
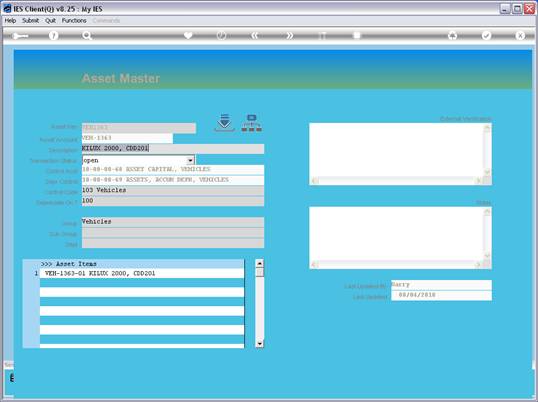
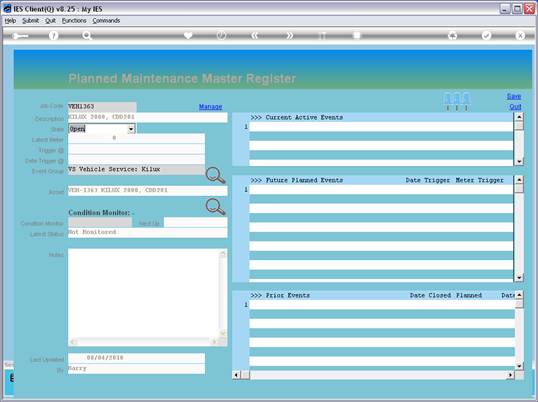
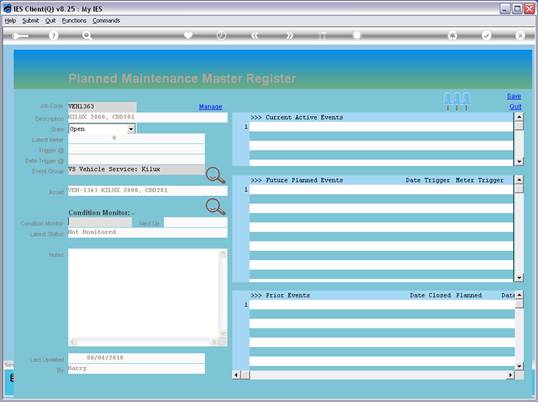
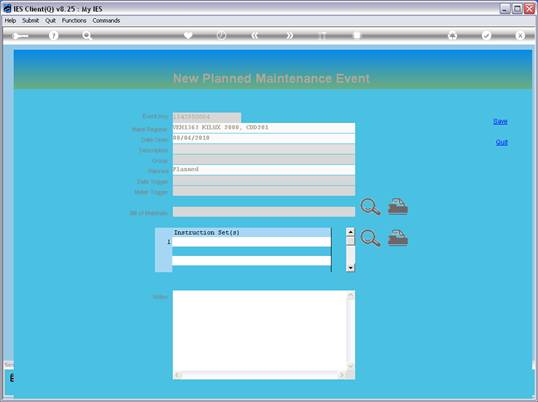
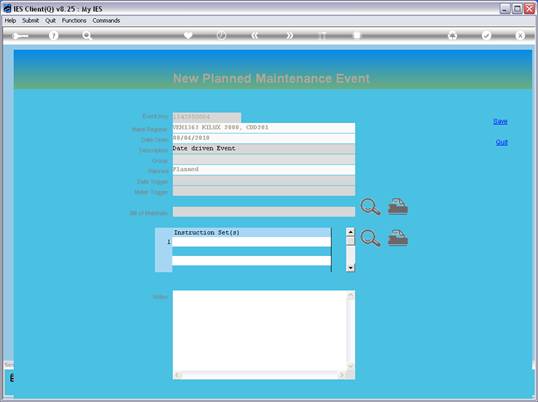
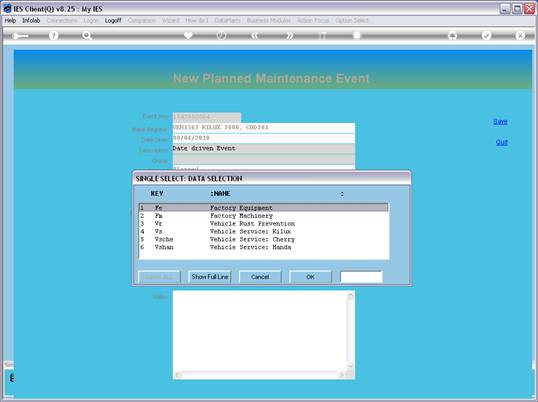
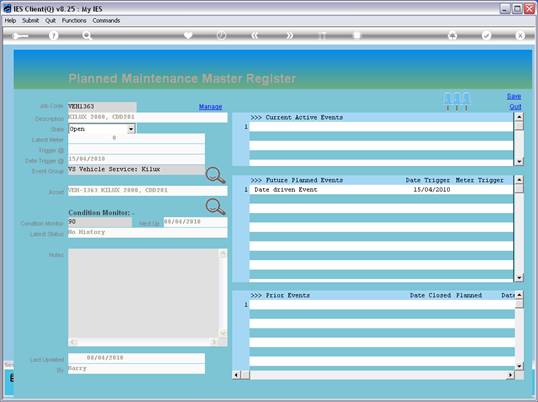
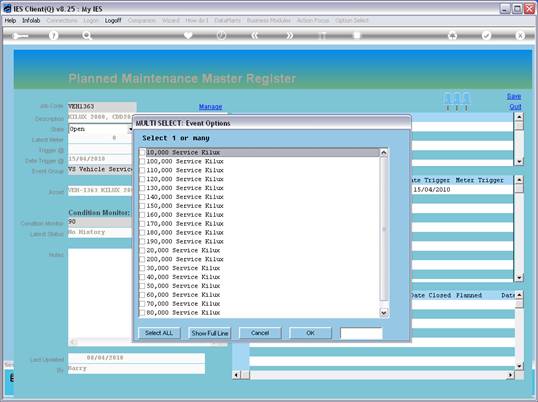
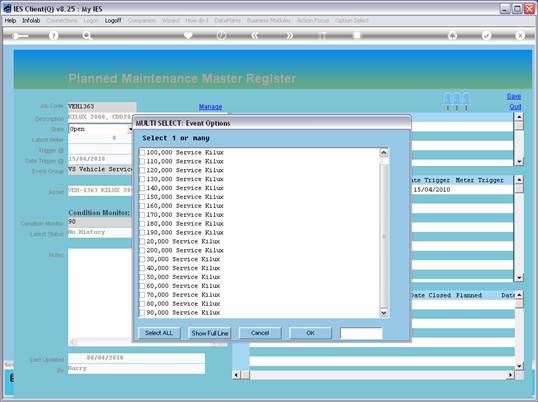
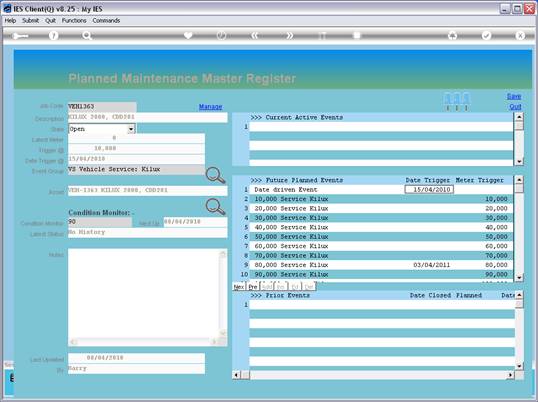
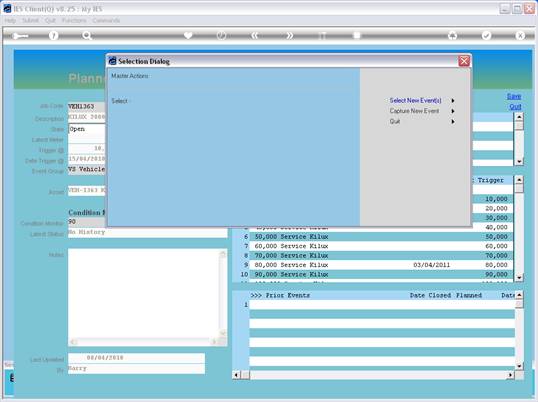
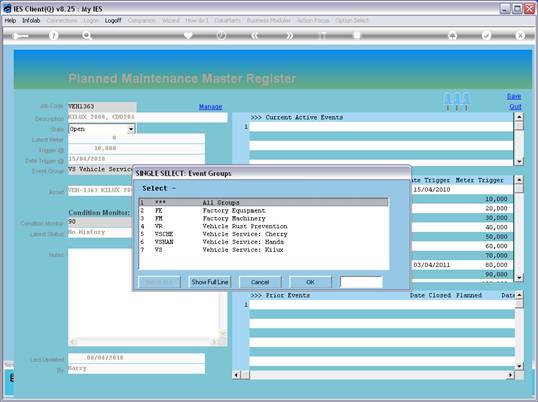
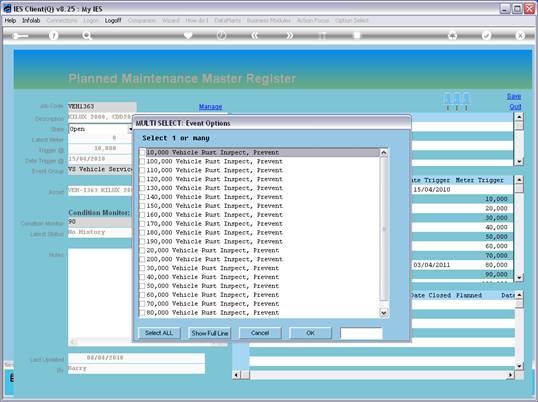
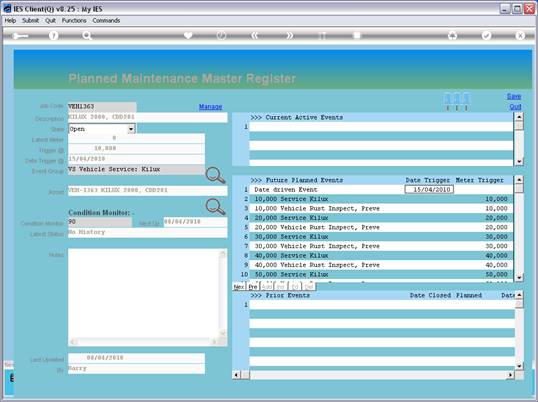
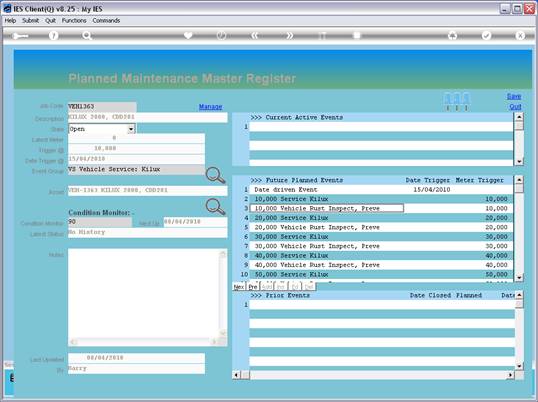
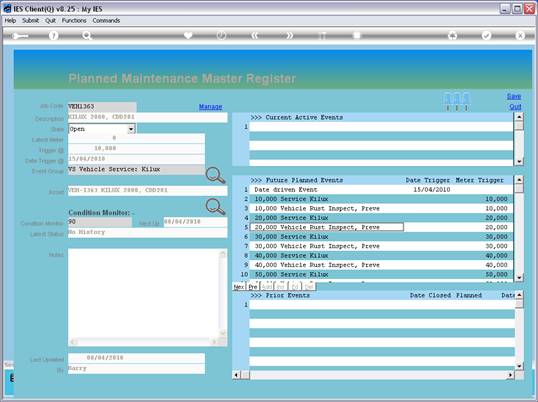
notes: Usually the Job already exists, because Items on the Planned Maintenance Register are most often also Assets on the Asset Register, and with linked Jobs in Job Costing to track the Life Costs for these Assets. The Planned Maintenance Costs will be a part of these Asset Job Life Costs. Nevertheless, in the event that the Job does not yet exist, we will define it first. And if it already exists, then we will ensure that the required Planned Maintenance Cost Types are listed on the Job or else insert them now.


Slide 5

Slide notes:


Slide 6

Slide notes:


Slide 7

Slide notes: Then we use the Planned Maintenance Master Register to define the new Maintenance Item.


Slide 8

Slide notes:


Slide 9

Slide notes:


Slide 10

Slide notes:


Slide 11

Slide notes: The Key has to be exactly the same as the Job Master Key.


Slide 12

Slide notes:


Slide 13

Slide notes:


Slide 14

Slide notes:


Slide 15

Slide notes:


Slide 16

Slide notes:


Slide 17

Slide notes: And of course there is no need to capture a description, because it is picked up from the Job Master.


Slide 18

Slide notes: By default, the state will be OPEN, and if we ever reach the stage where there will no longer be any Maintenance on this Item for whatever reason, then we will CLOSE it.


Slide 19

Slide notes:


Slide 20

Slide notes:


Slide 21

Slide notes: Since this is a brand new Vehicle, and we have no reading on the Meter yet, therefore it  shows zero. There is also no 'next trigger by meter' indication, since there are no Events listed yet.


Slide 22

Slide notes: The same with the Date trigger.


Slide 23

Slide notes:


Slide 24

Slide notes: It is recommended to associate the Maintenance Item with the most logical Event Group that it will use, and it does not prevent us from including Events from other Groups as well. We are simply choosing the major association.


Slide 25

Slide notes:


Slide 26

Slide notes:


Slide 27

Slide notes: Since we have now satisfied the minimum requirements, we can save the record. It is not necessary to save now, because we want to do more work, but we will save anyway to show that we can do it this way and continue with more work on the item at a later stage.


Slide 28

Slide notes:


Slide 29

Slide notes:


Slide 30

Slide notes:


Slide 31

Slide notes:


Slide 32

Slide notes:


Slide 33

Slide notes:


Slide 34

Slide notes: To retrieve the same or any other Item on the Maintenance Register, we can use any of the usual lookup methods. In this case, we will use a keyword that is part of the name of this Item.


Slide 35

Slide notes:


Slide 36

Slide notes:


Slide 37

Slide notes: Note that the system now knows the linked Asset as well, which is picked up from the Job Master. If there is a linked Asset, then we can also drill it.


Slide 38

Slide notes:


Slide 39

Slide notes:


Slide 40

Slide notes: On the Asset Master, we can also drill all detail for the Asset, including Transactions, etc.


Slide 41

Slide notes: Condition Monitoring for any Maintenance Item is optional. For this new Item, we have not stated any Monitoring yet, but we can already open the Monitor Check sheet.


Slide 42

Slide notes:


Slide 43

Slide notes: When Maintenance Items are numerous and in different places, then it is recommended to indicate where the Items can be found, as this will assist Maintenance Staff and those who need to inspect the Items. However, it is not mandatory to complete this field.


Slide 44

Slide notes:


Slide 45

Slide notes: There is as yet no Condition Monitoring history on this new Item, but over time, all the records of when this Item was inspected will appear here.


Slide 46

Slide notes:


Slide 47

Slide notes:


Slide 48

Slide notes:


Slide 49

Slide notes:


Slide 50

Slide notes: The Help for the Condition Monitor explains that we need to indicate a number of days in a cycle after which the Item should be inspected, otherwise there is no official condition monitoring taking place.


Slide 51

Slide notes:


Slide 52

Slide notes: So we insert a 90 day cycle in this case, and that means that this Item will be inspected every 3 months, approximately, and will automatically appear on the Inspection Report accordingly.


Slide 53

Slide notes: Notes are optional to use on any Maintenance Item.


Slide 54

Slide notes:


Slide 55

Slide notes: We cannot enter new Events directly at the Current, Future or Prior Event grids. We can only do it with the 'Manage' option.


Slide 56

Slide notes: And we can either capture a new Event, or we can select from the Event Templates.


Slide 57

Slide notes: We start with an example of capturing a new Event, and in this case we will use a Date Trigger to demonstrate the effect.


Slide 58

Slide notes:


Slide 59

Slide notes:


Slide 60

Slide notes:


Slide 61

Slide notes:


Slide 62

Slide notes:


Slide 63

Slide notes:


Slide 64

Slide notes:


Slide 65

Slide notes:


Slide 66

Slide notes:


Slide 67

Slide notes:


Slide 68

Slide notes:


Slide 69

Slide notes:


Slide 70

Slide notes: We can also include a Bill of Materials and some Instructions at this stage, but it is not essential to do so. In fact, it can also be done later or not at all. So now we can save this Event.


Slide 71

Slide notes:


Slide 72

Slide notes: Note that the Event immediately appears at Future Events.


Slide 73

Slide notes: And all of a sudden, the Master Item also displays the earliest Date Trigger among all Events for this Maintenance Master Item. When we load some other Events, the same thing is going to happen with the Meter Trigger.


Slide 74

Slide notes:


Slide 75

Slide notes: Now we will use the selection method. This is a very productive way of setting up the Events for a new Maintenance Item, because we can easily select all the Future Events from the Templates.


Slide 76

Slide notes:


Slide 77

Slide notes: So we select the group that includes the Maintenance Events for servicing this kind of Item, in this case a Vehicle of type "Kilux".


Slide 78

Slide notes: All the expected Service Events for this Item type are listed, and although we can pick and choose only some of the events, it is likely that we can simply select all.


Slide 79

Slide notes:


Slide 80

Slide notes:


Slide 81

Slide notes:


Slide 82

Slide notes: So now all the expected service events for a lifetime for this Vehicle have been included.


Slide 83

Slide notes: And we will also include all the Rust inspection and treatment events.


Slide 84

Slide notes:


Slide 85

Slide notes:


Slide 86

Slide notes:


Slide 87

Slide notes:


Slide 88

Slide notes: Notice how the system automatically sorts all the Future Events in sequence of expected triggering, i.e. by date and meter.


Slide 89

Slide notes: The 1st expected Meter trigger will be at 10,000.


Slide 90

Slide notes:


Slide 91

Slide notes:


Slide 92

Slide notes: And therefore the system is also able to indicate now that the next expected Meter trigger, for this Maintenance Item overall, is at 10,000.


Slide 93

Slide notes: So this is how we may easily set up a new Planned Maintenance Master Item.